In this project, you can see all the steps for Interfacing a 16×2 LCD with Raspberry Pi like circuit diagram, components, working, Python Program and explanation of the code. Even though the Raspberry Pi computer is capable of doing many tasks, it doesn’t have a display for implementing it in simple projects. A 16×2 Alphanumeric Character LCD Display is a very important types of display for displaying some basic and vital information. The combination of Raspberry Pi and 16×2 LCD Display can be used many projects and applications. Before interfacing 16×2 LCD with Raspberry Pi, you need to understand How to setup the Raspberry Pi in headless way (without monitor and keyboard).
A Brief Note about 16×2 LCD
A 16×2 LCD is one of the most popular display modules among hobbyists, students and even electronics professionals. It supports 16 characters per row and has two such rows. Almost all the 16×2 LCD Display Modules that are available in the market are based on the Hitachi’s HD44780 LCD Controller. Typically, a 16×2 LCD Module consists of 16 Pins. The pin description of the 16×2 LCD Display Module is shown in the following table.
Circuit Diagram of 16×2 LCD Interfacing with Raspberry Pi
The pin description in the above table shows that a 16×2 LCD has 8 data pins. Using these data pins, we can configure the 16×2 LCD in either 8 – bit mode or 4 – bit mode. I’ll show the circuit diagram for both the modes.
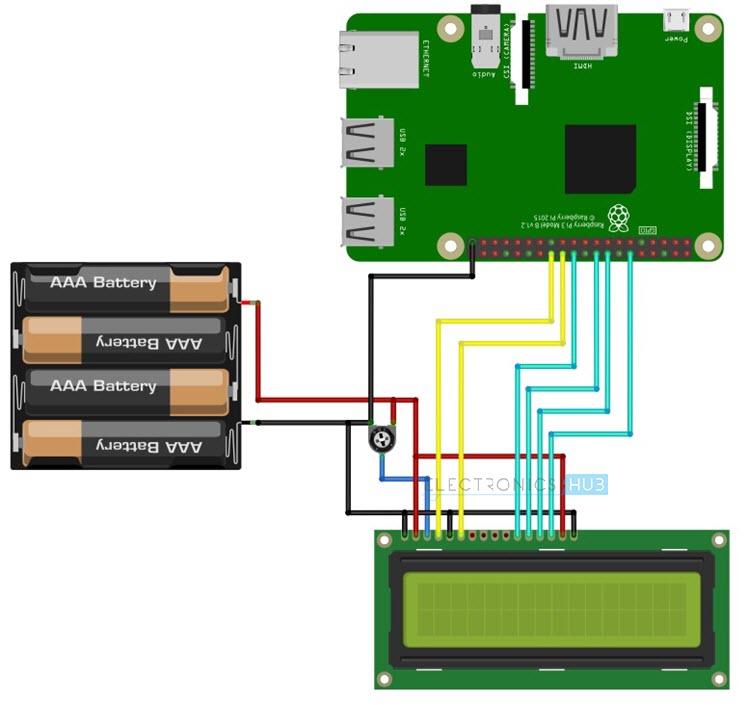
Fritzing Circuit
In 8 – bit mode, all the 8 data pins i.e. D0 to D7 are used for transferring data. This type of connection requires more pins on the Raspberry Pi. Hence, we have opted for 4 – bit mode of LCD. The circuit diagram (with Fritzing parts) is shown below.
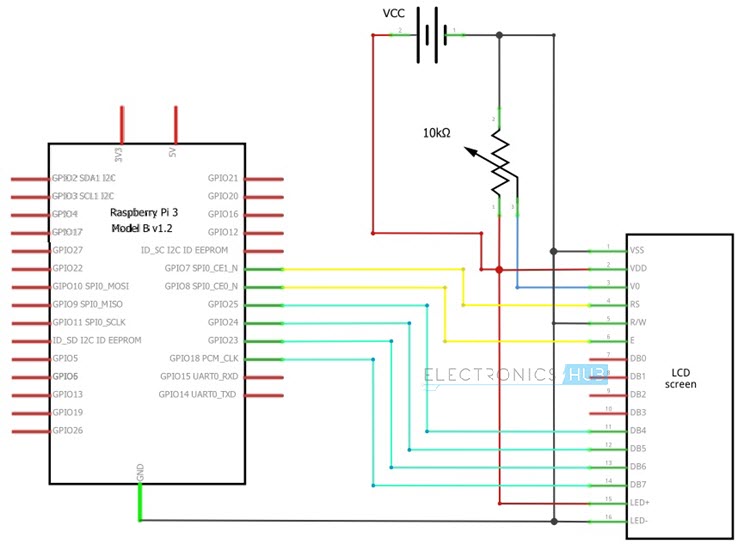
Circuit Diagram
The following image shows the wiring diagram of the featured circuit of this project i.e. LCD in 4 – bit mode. In this mode, only 4 data pins i.e. D4 to D7 of the LCD are used.
NOTE: In this project, we have used the 4 – bit mode of the 16×2 LCD display. The Python code explained here is also related to this configuration. Slight modifications are needed in the Python Program if the circuit is configured in 8 – bit mode.
Components Required
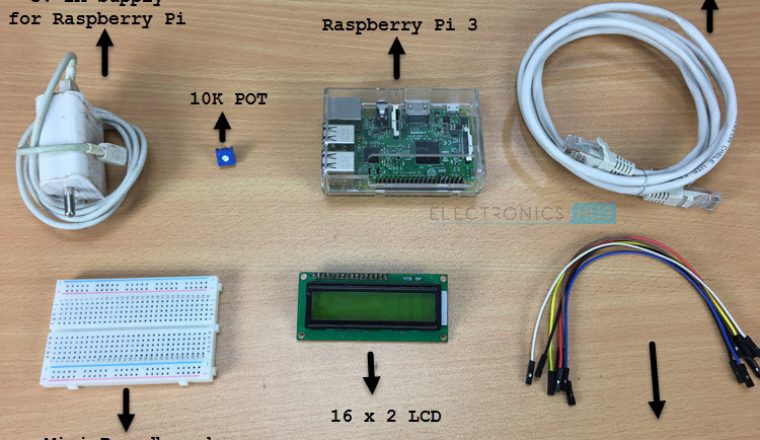
Raspberry Pi 3 Model B (any Raspberry Pi) 16 x 2 LCD Module 10 KΩ Potentiometer Mini Breadboard Connecting wires (Jumper wires) 5V – 2A Power Supply Miscellaneous (Computer, Ethernet Cable, etc.)
Circuit Design
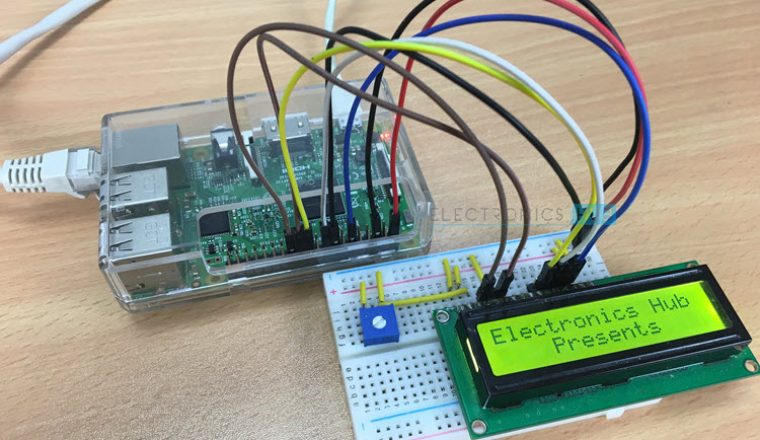
The design of the circuit for Interfacing 16×2 LCD with Raspberry Pi is very simple. First, connect pins 1 and 16 of the LCD to GND and pins 2 and 15 to 5V supply. Then connect a 10KΩ Potentiometer to pin 3 of the LCD, which is the contrast adjust pin. The three control pins of the LCD i.e. RS (Pin 4), RW (Pin 5) and E (Pin 6) are connected to GPIO Pin 7 (Physical Pin 26), GND and GPIO Pin 8 (Physical Pin 24). NOTE: The numbering of the Raspberry Pi Pins is expressed using BCM Numbering Scheme. Now, the data pins of the LCD. Since we are configuring the LCD in 4 – bit mode, we need only 4 data pins (D4 to D7). D4 of LCD is connected to GPIO25 (Physical Pin 22), D5 to GPIO24 (Physical Pin 18), D6 to GPIO24 (Physical Pin 16) and D7 to GPIO18 (Physical Pin 12).
Python Program for Interfacing 16×2 LCD with Raspberry Pi
Working of the Project and Code Explanation
How to operate the Project?
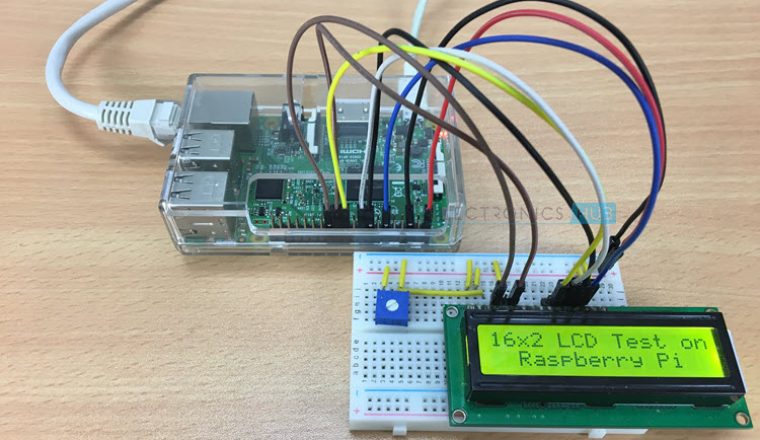
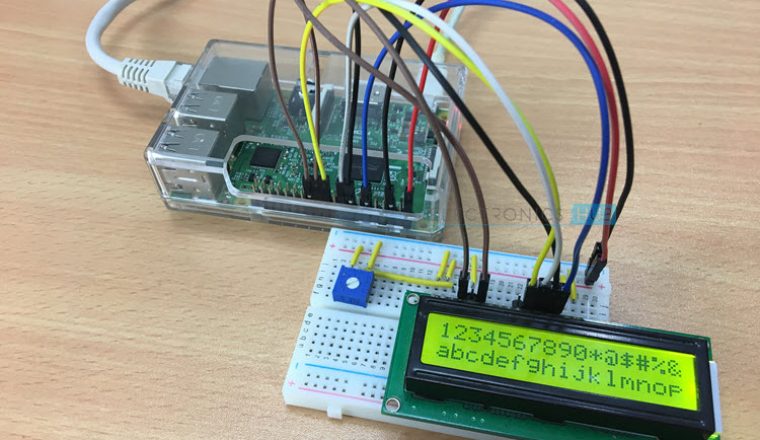
The working of project for Interfacing 16×2 LCD with Raspberry Pi is very simple. After making the connections as per the circuit diagram, login to your Raspberry Pi using SSH Client like Putty in Windows. Alternatively, you can use any VNC Viewer software like RealVNC. (NOTE: I’ve used RealVNC Software for accessing the Raspberry Pi’s Desktop on my personal computer). I’ve created a folder named “Python_Progs” on the desktop of the Raspberry Pi. So, I’ll be saving my Python Program for Interfacing 16 x 2 LCD with Raspberry Pi in this folder. Using “cd” commands in the terminal, change to this directory. After that, open an empty Python file with name “lcdPi.py” using the following command in the terminal. sudo vim lcdPi.py NOTE: In the previous tutorial of How to Blink an LED using Raspberry Pi, I’ve discussed about Vim Editor. Now, copy the above code and paste it in the editor. It is important to properly use the Tab characters as they help in grouping the instructions in Python. Save the file and close the editor. To test the code, type the following command in the terminal. If everything is fine with your connections and Python Program, you should be able to see the text on the 16×2 LCD. sudo python lcdPi.py To exit the program, simply press CRTL+C in the terminal.
Code Explanation
First, I’ve imported the RPi.GPIO Python Package as GPIO (here after called as GPIO Package) and sleep from time package. Then, I have assigned the pin for LCD i.e. RS, E, D4, D5, D6 and D7. The numbering scheme I followed is GPIO or BCM Scheme. NOTE: I have also commented the Physical pin numbers of the corresponding Pins. Then I have used some functions of the GPIO package like GPIO.setwarnings (False), GPIO.setmode (GPIO.BCM) and GPIO.setup(). Finally, using some own functions like lcd_init, lcd_string, lcd_display, etc. I’ve transmitted the data to be printed from the Raspberry Pi to the 16×2 LCD Module.
Applications of Interfacing 16×2 LCD with Raspberry Pi
By interfacing 16×2 LCD with Raspberry Pi, we can have a simple display option for our raspberry Pi which can display some basic information like Date, Time, Status of a GPIO Pin, etc. Many simple and complex application of Raspberry Pi like weather station, temperature control, robotic vehicles, etc. needs this small 16×2 LCD Display.
Limitations
The 16×2 LCD Module can only display simple alphanumeric characters. Even though some special characters and custom characters can be displayed, information which is graphic intensive cannot be displayed.
Comment * Name * Email * Website
Δ




![]()